Uploading and Organising Media
In the Media area, you can create folders to organise media and upload images and PDFs. Drag and drop to upload, or create new items. We strongly recommend keeping the Media area organised using folders.
Click on each image to view it and add a description. We recommend that all images have descriptions.
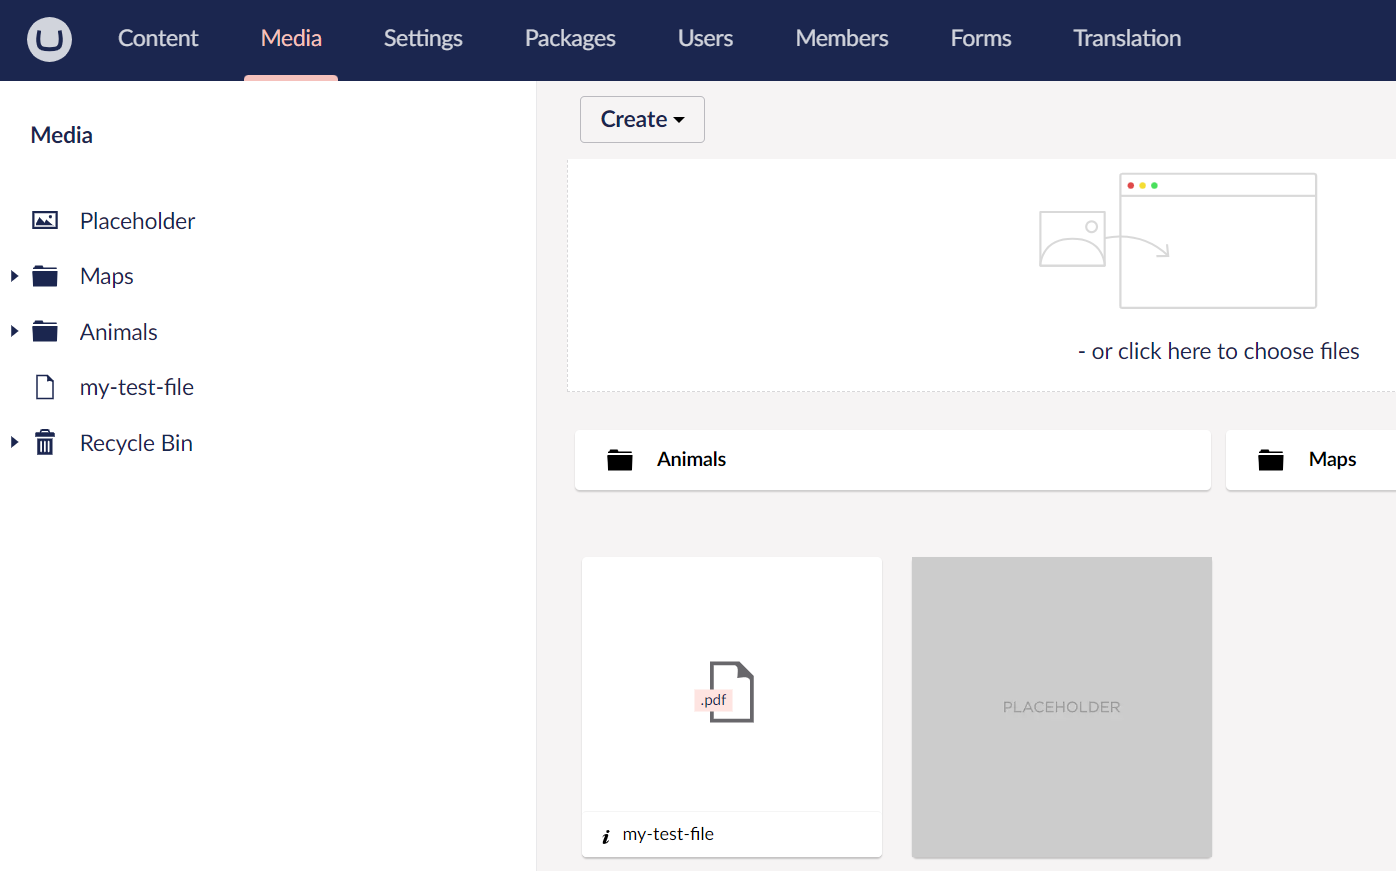
Image Guidelines and Editing
The website code handles a lot of the optimisation work — ensuring the right sized image is used for the device width it's displayed on, and keeping file sizes down to help with page speed. Key guidelines:
- Upload images with a similar aspect ratio to the website element they'll be used in — if the area is landscape, avoid using a very portrait image.
- Upload images bigger than the area they'll be used in — don't use a 200px wide image as a hero image.
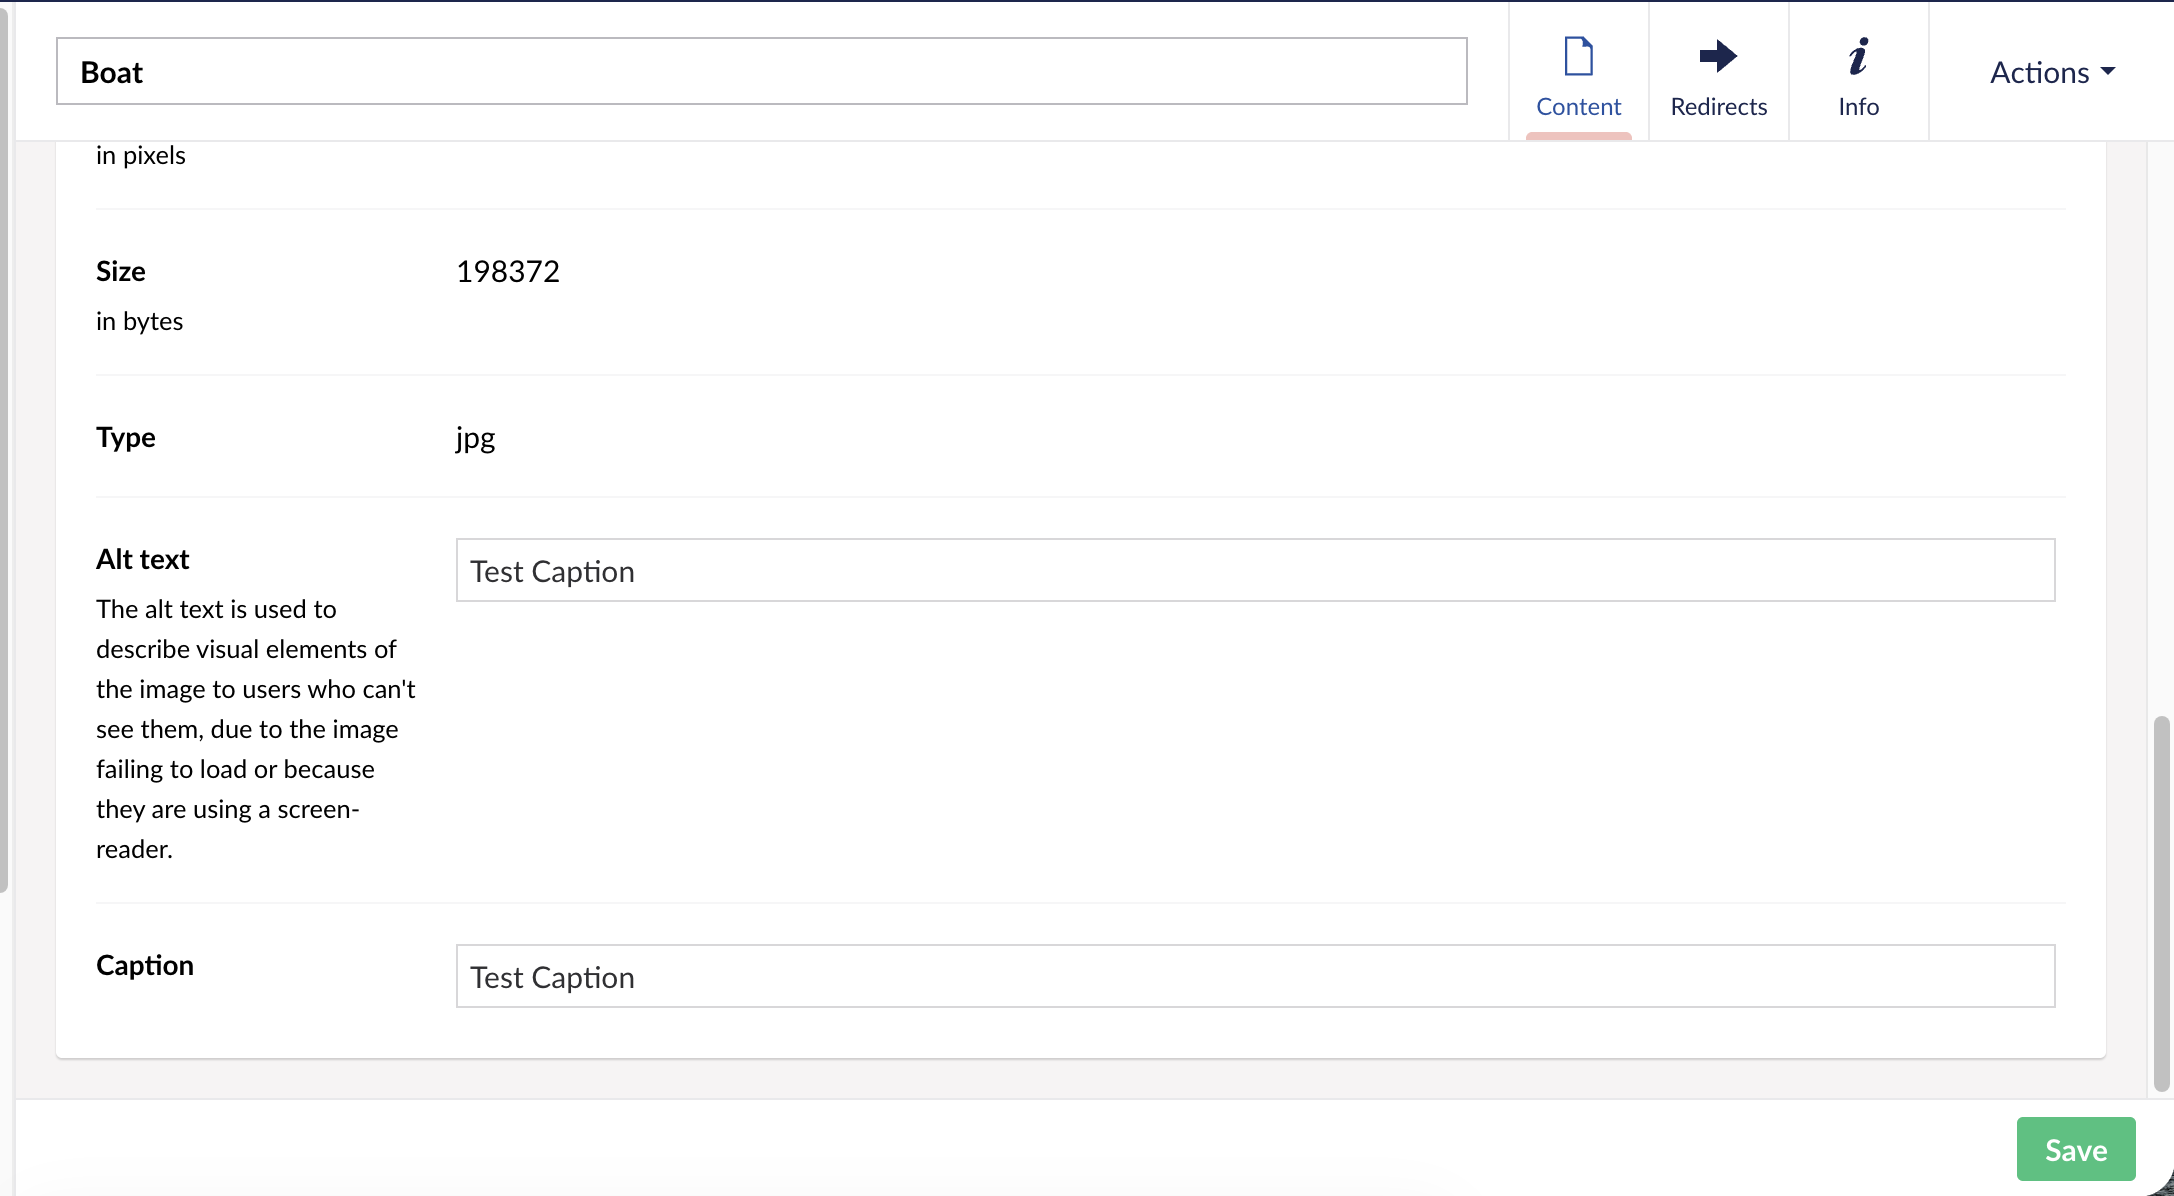
- Always add an image description in the CMS — this will be used as the alt text.
- Where possible, avoid using text directly in images — there's usually an option to add content that overlays the image as live text.
Images must be less than 15mb and less than 5,000px tall or wide. Please ensure images are smaller than this.
Image Crops and Mobile Optimisation
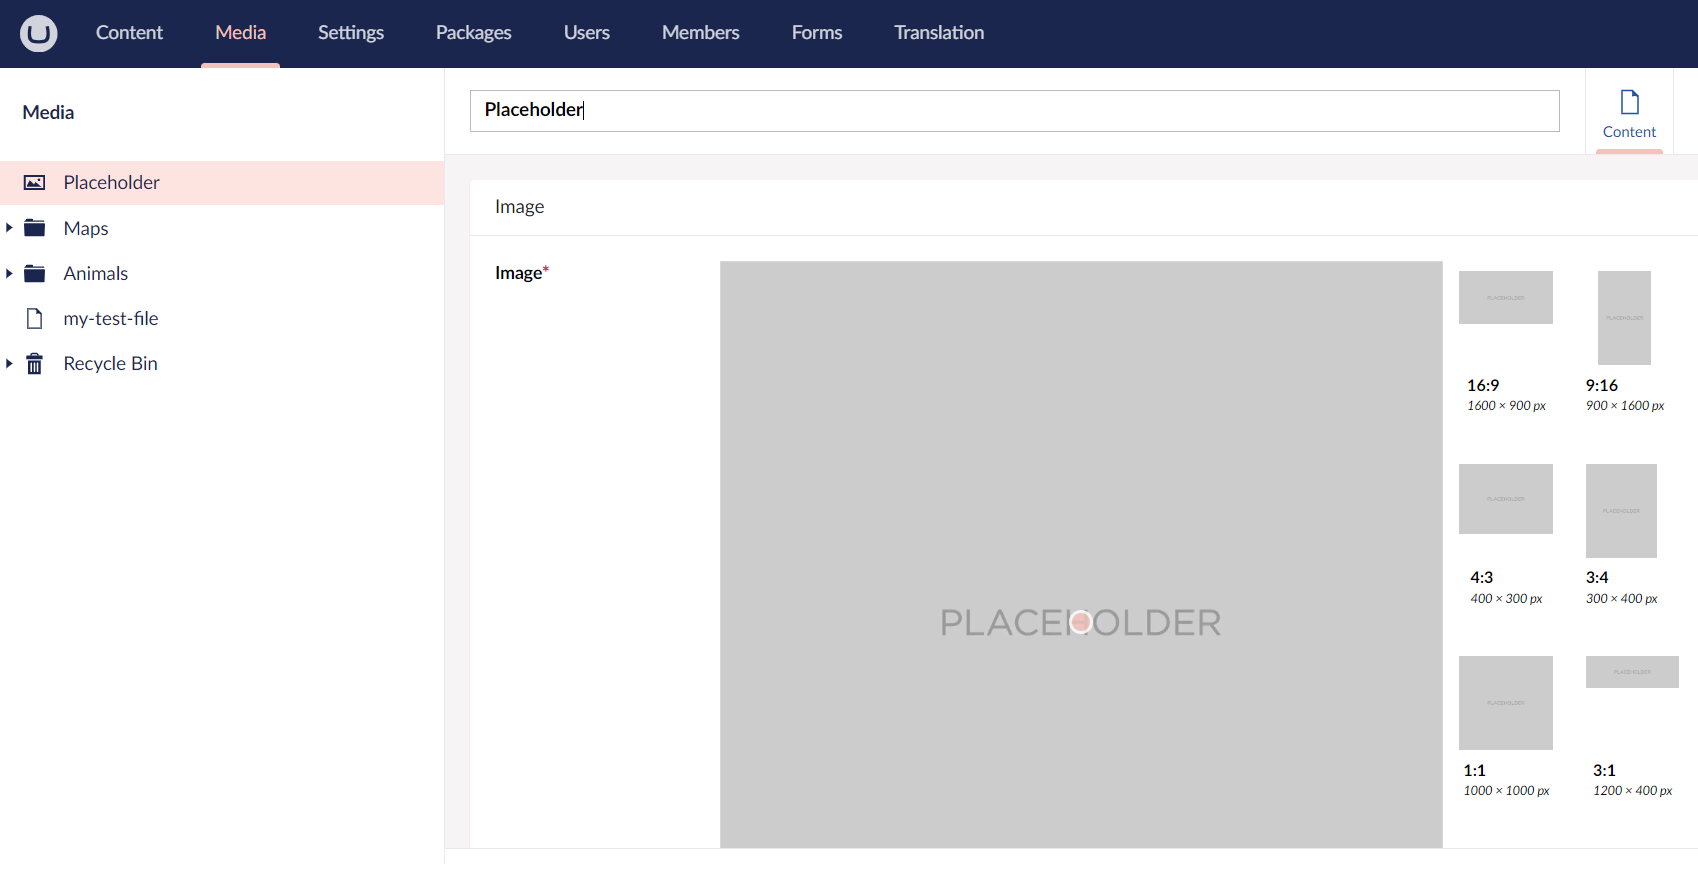
Depending on the device size, a different aspect ratio will be used for some images. The Media area allows you to control the crop and focal point of an image for different aspect ratios.
Click into the image, then click on the various aspect ratios on the right-hand side. Drag the image around to change the visible area, or drag the focal point dot to change which part of the image is prioritised.
- Horizontal panel listing: 16:9 — minimum 800px wide
- Hero (full width): 16:9 — minimum 2000px
- Homepage hero split: 2:1 — minimum 1000px
Remember to only use PNG images if you need transparency in the image. Large PNGs don't optimise well and can impact your pagespeed and bandwidth usage.
ALT-Text and Accessibility
Add image ALT-Text to describe images for people with visual impairments using screenreaders. If you don't set this, the image filename is used instead — so a descriptive filename is an easy fallback.
Linking to a File or PDF
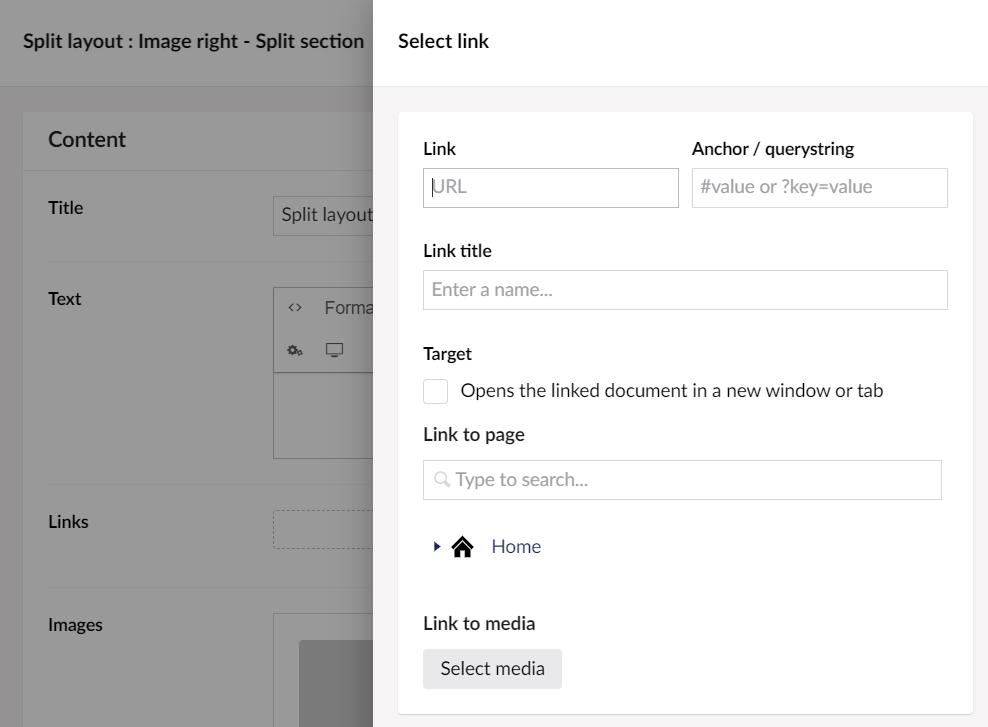
Once uploaded, link to a PDF from a page by clicking the 'Insert/edit Link' symbol in the rich text editor, then selecting 'Select media' in the 'Link to media' section.
Was this article helpful?
That’s Great!
Thank you for your feedback
Sorry! We couldn't be helpful
Thank you for your feedback
Feedback sent
We appreciate your effort and will try to fix the article